Node.js for .NET Developers (2015)
Chapter 1. Setup
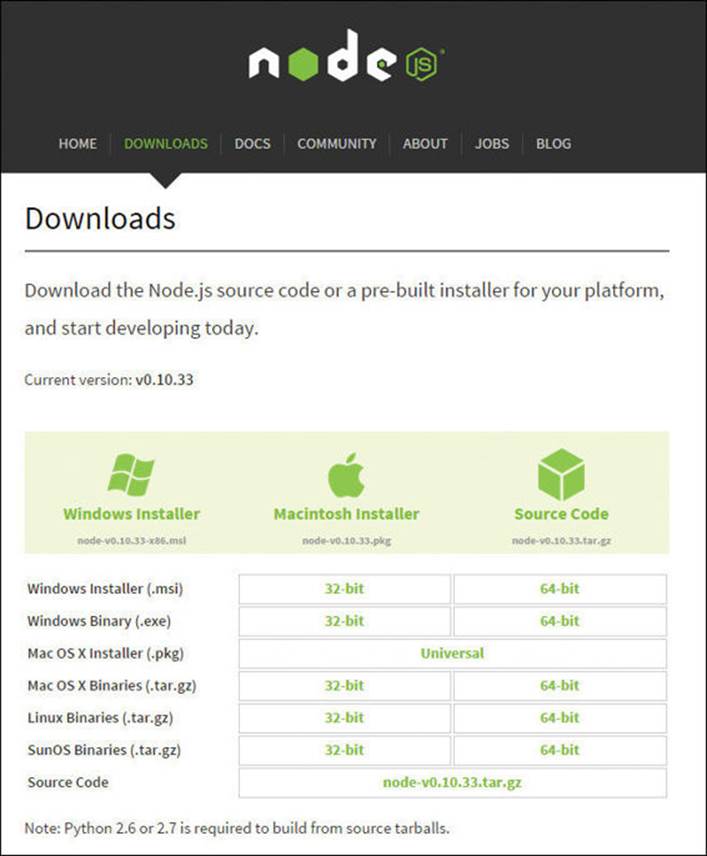
To begin, head over to NodeJS.org and either just click Install or navigate to the site downloads page where you will see the following:
When you run the .msi file you choose to install, you will see the following:
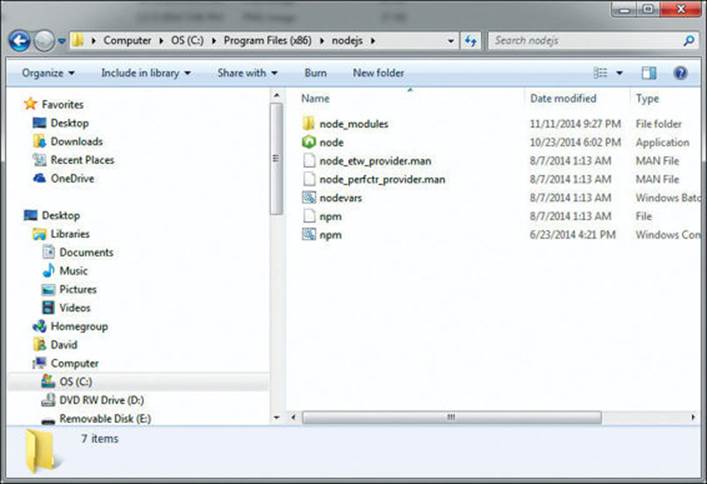
If it all runs properly, you will see the following in whatever directory you specified:
Along with that, you should be able to find a Node.js command prompt in your Start menu. If you click and launch it, you should see this:
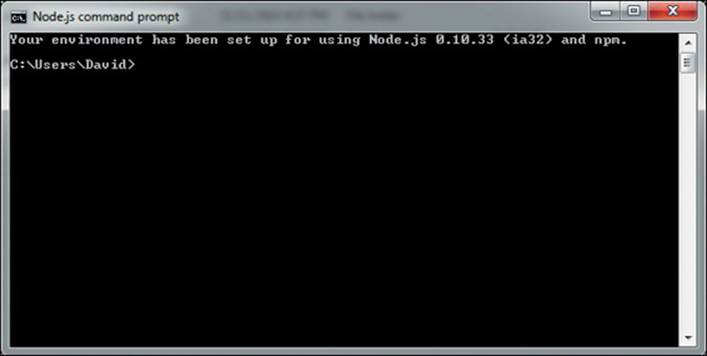
Note how this console entry mentions npm. That’s the critical package-management application you need to have in place that will enable you to install all the additional packages you will need to more quickly build your Node.js application.
You’ll be doing so from the command prompt as shown, just not this specific command prompt. That is because you don’t want to have to do it twice. The npm application downloads the necessary packages to the current directory of your command prompt and nowhere else. I will assume that the location just shown is not where your Microsoft Visual Studio projects usually live, and because you are about to wire Node.js to Visual Studio you will want npm to install packages to the directory you will actually be using. Connecting Node.js to your instance of Visual Studio 2010 is not difficult and only involves changing the properties of the project.
 Tip
Tip
If you are using Visual Studio 2012 or later, there is now a plug-in available from Microsoft to create Express versions of Node.js projects. It makes the creation of a Node.js project, or any other JavaScript project, as simple as creating any other kind of project using the standard menu shown here. However, I demonstrate doing so in the absence of the plug-in.
I simply set mine up to start with an empty ASP.NET web application as shown here:
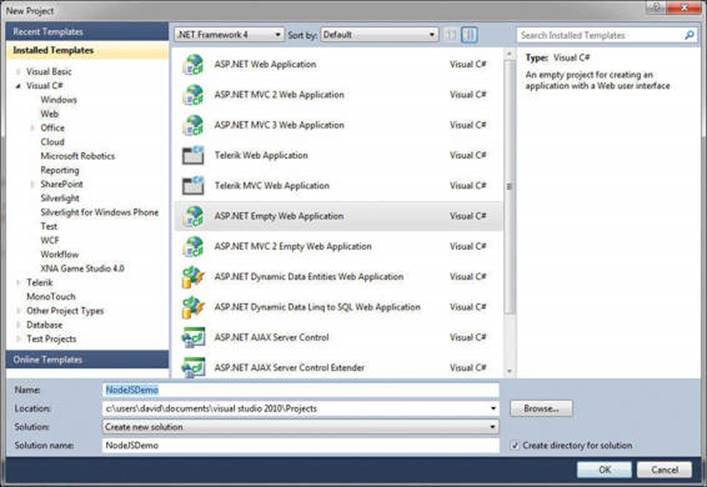
Then I made some quick and easy changes to the properties on the Project tab on your top navigation menu. The specific properties to change can be found on the Web tab, which is the third one from the top:

The important section is here:

It involves four quick steps:
1. Tell Visual Studio to run an external application on startup and not simply a page within your application as usual.
2. Specify the application, including its location and any command-line arguments.
This is where you refer to the location of your Node.js install.
3. Indicate the arguments and program call exactly as shown.
4. Specify a working directory for all npm package downloads. Typically, this would be the working directory of your web application.
Now you’re all set to use Visual Studio for building a Node.js application.
The first step for doing actual development is to start downloading some support npm packages to make your life easier. Again, you can think of an npm package as a third-party DLL—in other words, as a library of ready-made functionality. In .NET, you get a whole slew of built-in libraries out of the box to get you going very quickly. Of course, .NET does take a bit longer to install than does Node.js—everything is a tradeoff—but Node.js out of the box is basically bereft of anything similar to .NET core libraries, so you have to manually build each feature you need on top of an npm package that you choose to fill the need.
You have a lot of npm packages to choose from—it’s the Wild West. Unless you already double as an open source guy, you might not be used to this, coming from the neat land of Microsoft help and samples and forums. My process of finding npm packages that worked together with other npm packages—and that had working code samples I could integrate, all done very manually—was one of trial and error.
My efforts resulted in the following list of npm packages that I use both in my applications and in this book. Again, you can choose others if in your searching you find some that appeal to you on one level or another. In everything from routing to caching to authorization, you have your choice.
I broke it down this way for needed site functionality:
Basic / Core
Routing
Request and QueryString
Response
Form data
Statement management
Database access
IO / File upload
Rendering
Authentication
Thus, for addressing individual areas, I selected an individual npm package—or, in some cases, more than one used in combination, such as for generating the UI. I’ll briefly summarize each of these cases in the following table and then cover them in detail later for each case as needed:
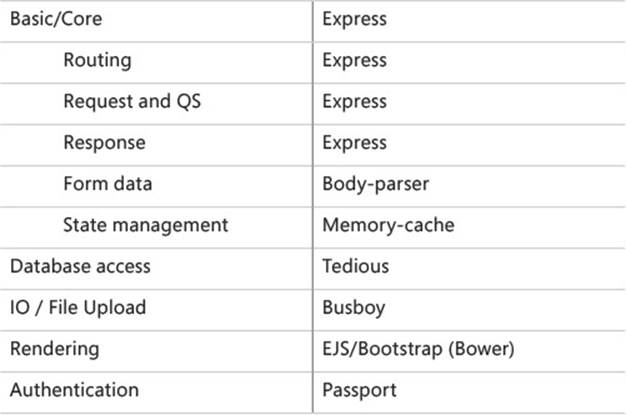
Here is a summary of the items in the preceding table:
 Express The backbone support harness for the Node.js core. It makes things like routing and sending responses very easy to do.
Body-parser A specific tool that gives you quick and easy access to values submitted using a Form Post.
Memory-cache A specific tool for allowing page-to-page (view-to-view) state management as a time-manageable Dictionary collection.
Tedious This amounts to a driver from Node.js for Microsoft SQL Server. It was chosen for this project simply because, right now, if you are working in .NET you probably are more likely to have to connect to SQL Server from a Node.js project than to any other database. However, a similar npm package for MySQL does exist, and you can use it if getting access to a SQL Server instance is a problem for you in any way.
EJS An embedded JavaScript rendering engine that will cause you to modify any HTML pages you create to instead use the file extension .ejs for page generation.
Bootstrap (and Bower) Bootstrap is a styling engine for the UI. Bower is similar to npm itself in that it must be downloaded prior to downloading other packages—in this case, packages for assisting in UI generation as opposed to core functionality like those of npm. Bower is downloaded using npm, and then Bootstrap and any other similar UI-centric libraries would be downloaded using Bower instead of npm. The command-line commands are nearly identical to npm.
Passport Passport is the package used for authentication, and it supports the typical user name and password plus Facebook, Twitter, and more.
We’ll install each of these packages needed for the application in this book. Installation is simple from the command line. Open it any way that you prefer. (Just remember that if you use your Node.js command prompt from its default location, you need to change directories as I mentioned earlier.)
Make sure that your actual command-line location matches the location you entered for the root directory of your project, because npm will install packages to that location.
Tip
To get to that location quickly, open the site root location in your file manager, right-click the file location at the top, and do a copy as text. Then use another right-click to paste that path after a cd command in your command window.
From that correct place in your file system, just type the following:
npm install express
Or you can even just type the following into the command line:
npm i express
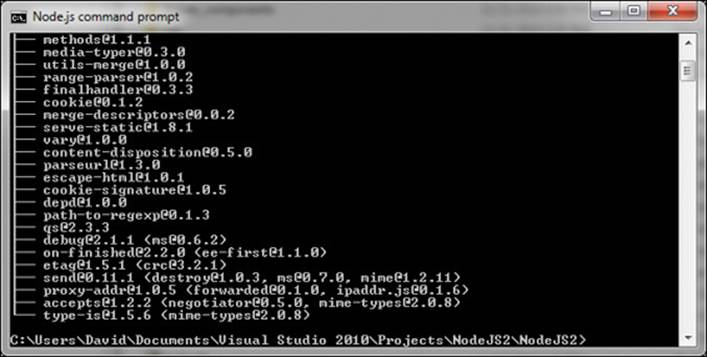
You should see something start to happen, like this:

The console should do something visually interesting in a minor way. When it’s done, the console will fill with affirmations of the download, meaning you are all set with the express package.
The process is identical for every package—just change the name of the package you want to download. As you can see, it happens very quickly.
Typically, at this point you just start plugging things in piece by piece as you code them. However, as long as you have the advantage of having mapped out each package you need for your application, let’s go ahead and grab the rest of the packages we’ll be using as we go. So while your command window is still open, type in each of the following one at a time and let each process run:
npm i body-parser
npm i memory-cache
npm i tedious
npm i ejs
npm i passport
npm i -g bower
bower i bootstrap
You can do these in any order as long as you do the highlighted Bower install before you try to do Bootstrap. As you can see, Bower package installation is nearly identical to the installation of a package with npm.
The only line to note is the highlighted line grabbing Bower itself, where the addition of the –g to the command tells the npm command to look globally for resources, rather than just within its own standard library list.
 Note
Note
The Bower website says the following: “Bower depends on Node.js and npm. Also make sure that git is installed as some bower packages require it to be fetched and installed.”
If you do not happen to have GIT installed already on your system, just go to the following site:
http://git-scm.com/downloads
From there, download the appropriate version for your system as suggested.
That more or less completes your setup process for starting to build your Node.js application. It’s really a perfect introduction to the world of Node.js in direct comparison with .NET. With Visual Studio, you download it, turn it on, code it, and you’re off. But with open source tools, you typically do everything yourself.
You have to do extra work under this coding model, but the tradeoff is that you have all the control this way. Also, as I mentioned, with the abundance of similar packages available, you can craft your application to your specific preference even in the deepest parts of its inner functionality.
With the setup done, let’s start taking a look at some code.
All materials on the site are licensed Creative Commons Attribution-Sharealike 3.0 Unported CC BY-SA 3.0 & GNU Free Documentation License (GFDL)
If you are the copyright holder of any material contained on our site and intend to remove it, please contact our site administrator for approval.
© 2016-2026 All site design rights belong to S.Y.A.